안드로이드 NDK를 사용한 C++ 개발 (OpenCV)
07 Jun 2019 | android programming thread handler안드로이드 NDK를 사용한 C++ 개발 (OpenCV)
NDK(Native Development Kit)란?
C와 C++과 같은 네이티브 코드 언어를 사용하여 앱의 일부를 구현할때 사용한다. NDK의 장점으로는 속도향상, 유연한 프로그램 개발, OpenCV/OpenGL 관련 영상처리 라이브러리들을 안드로이드 프로젝트에서 사용할 수 있게 한다.
JNI(Java Native Interfact)란?
Java와 C/C++ 라이브러리를 연동시켜주는 인터페이스이고, JNI를 사용하면 NDK를 사용할 수 있다.
안드로이드 스튜디오에서 NDK 사용법
Android Studio 3.2.1 + Mac에서 작성하였습니다.
-
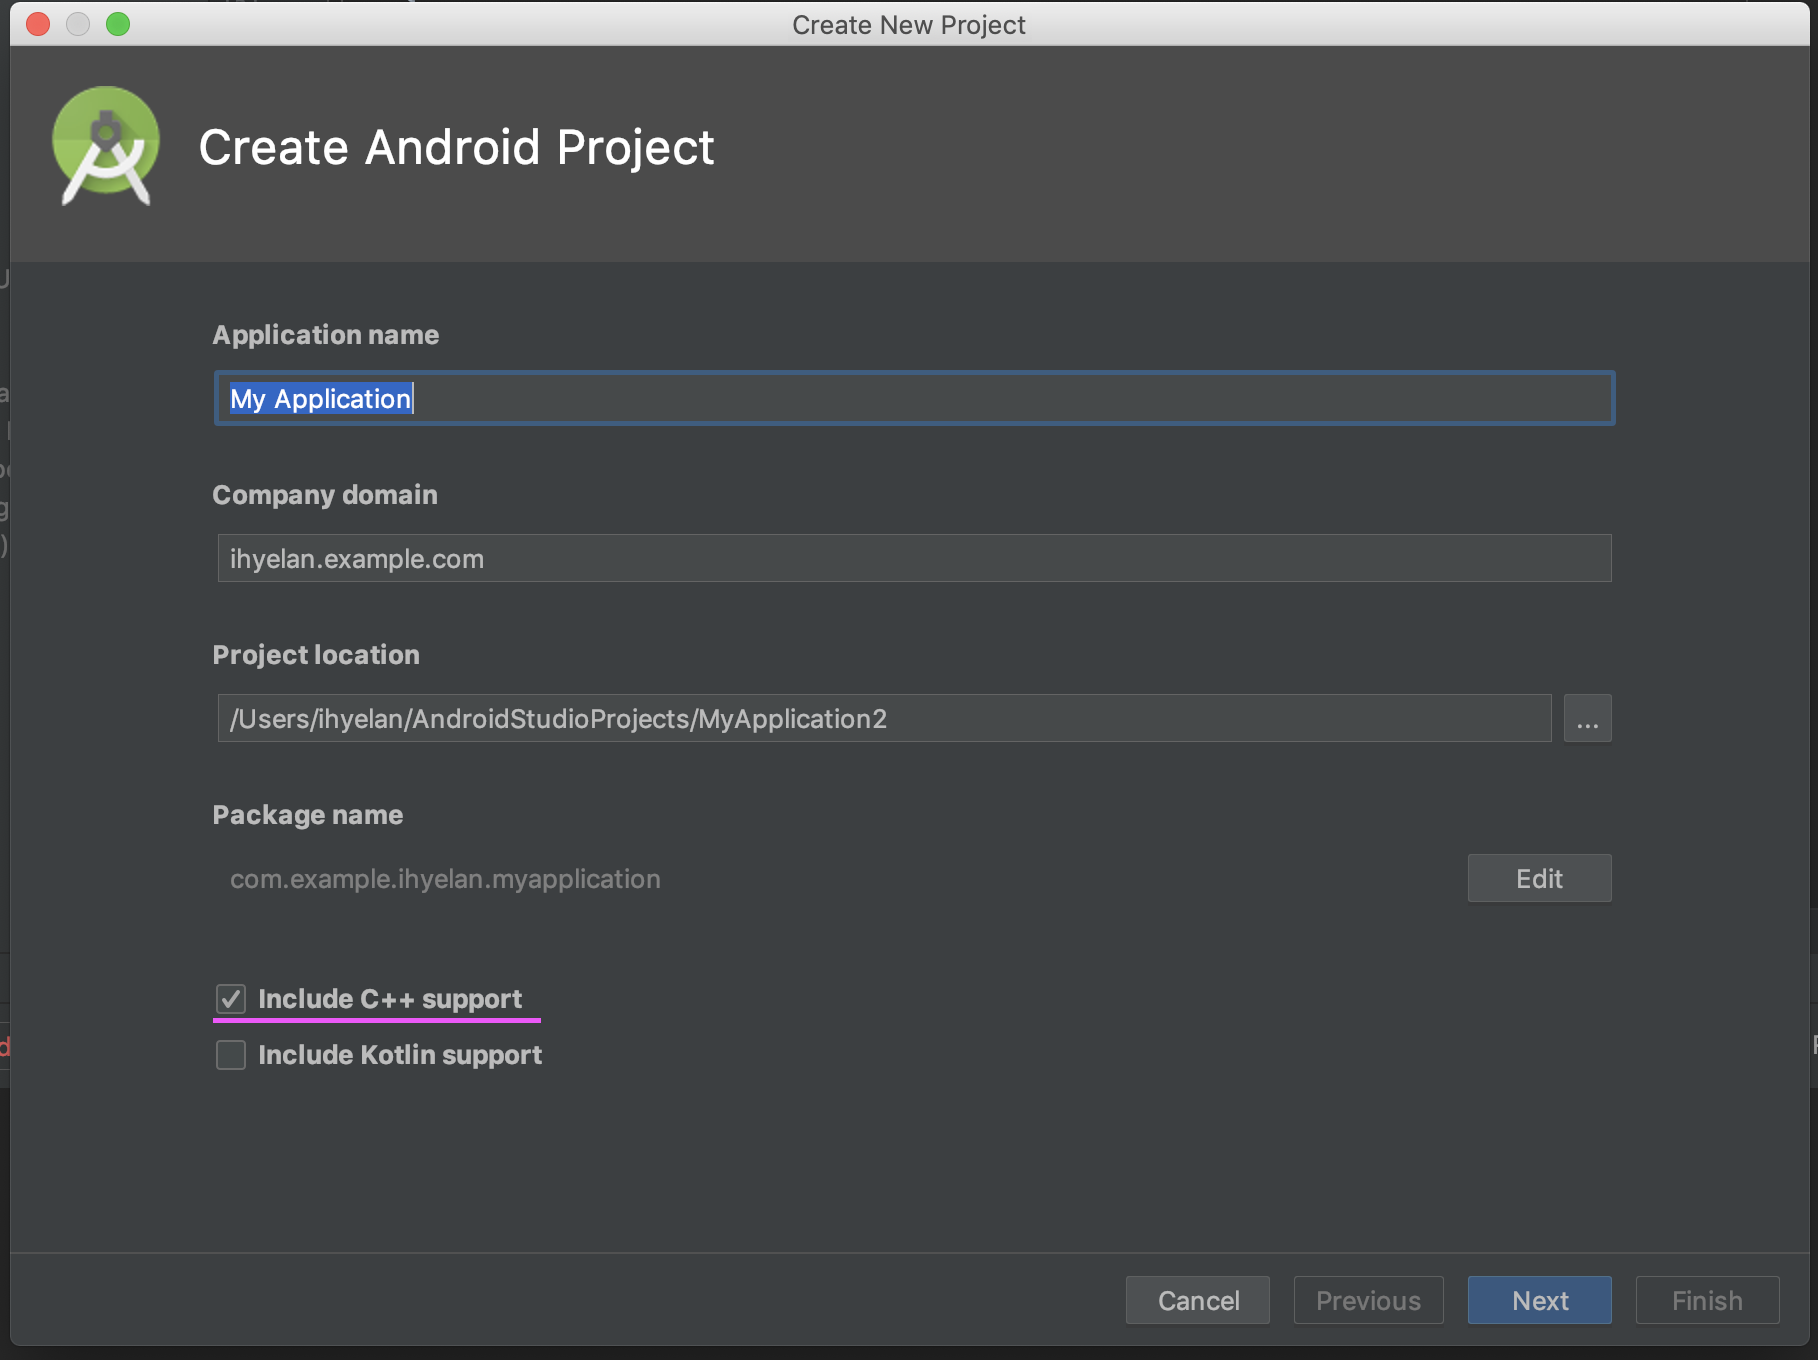
C++을 지원하는 안드로이드 프로젝트 생성
-
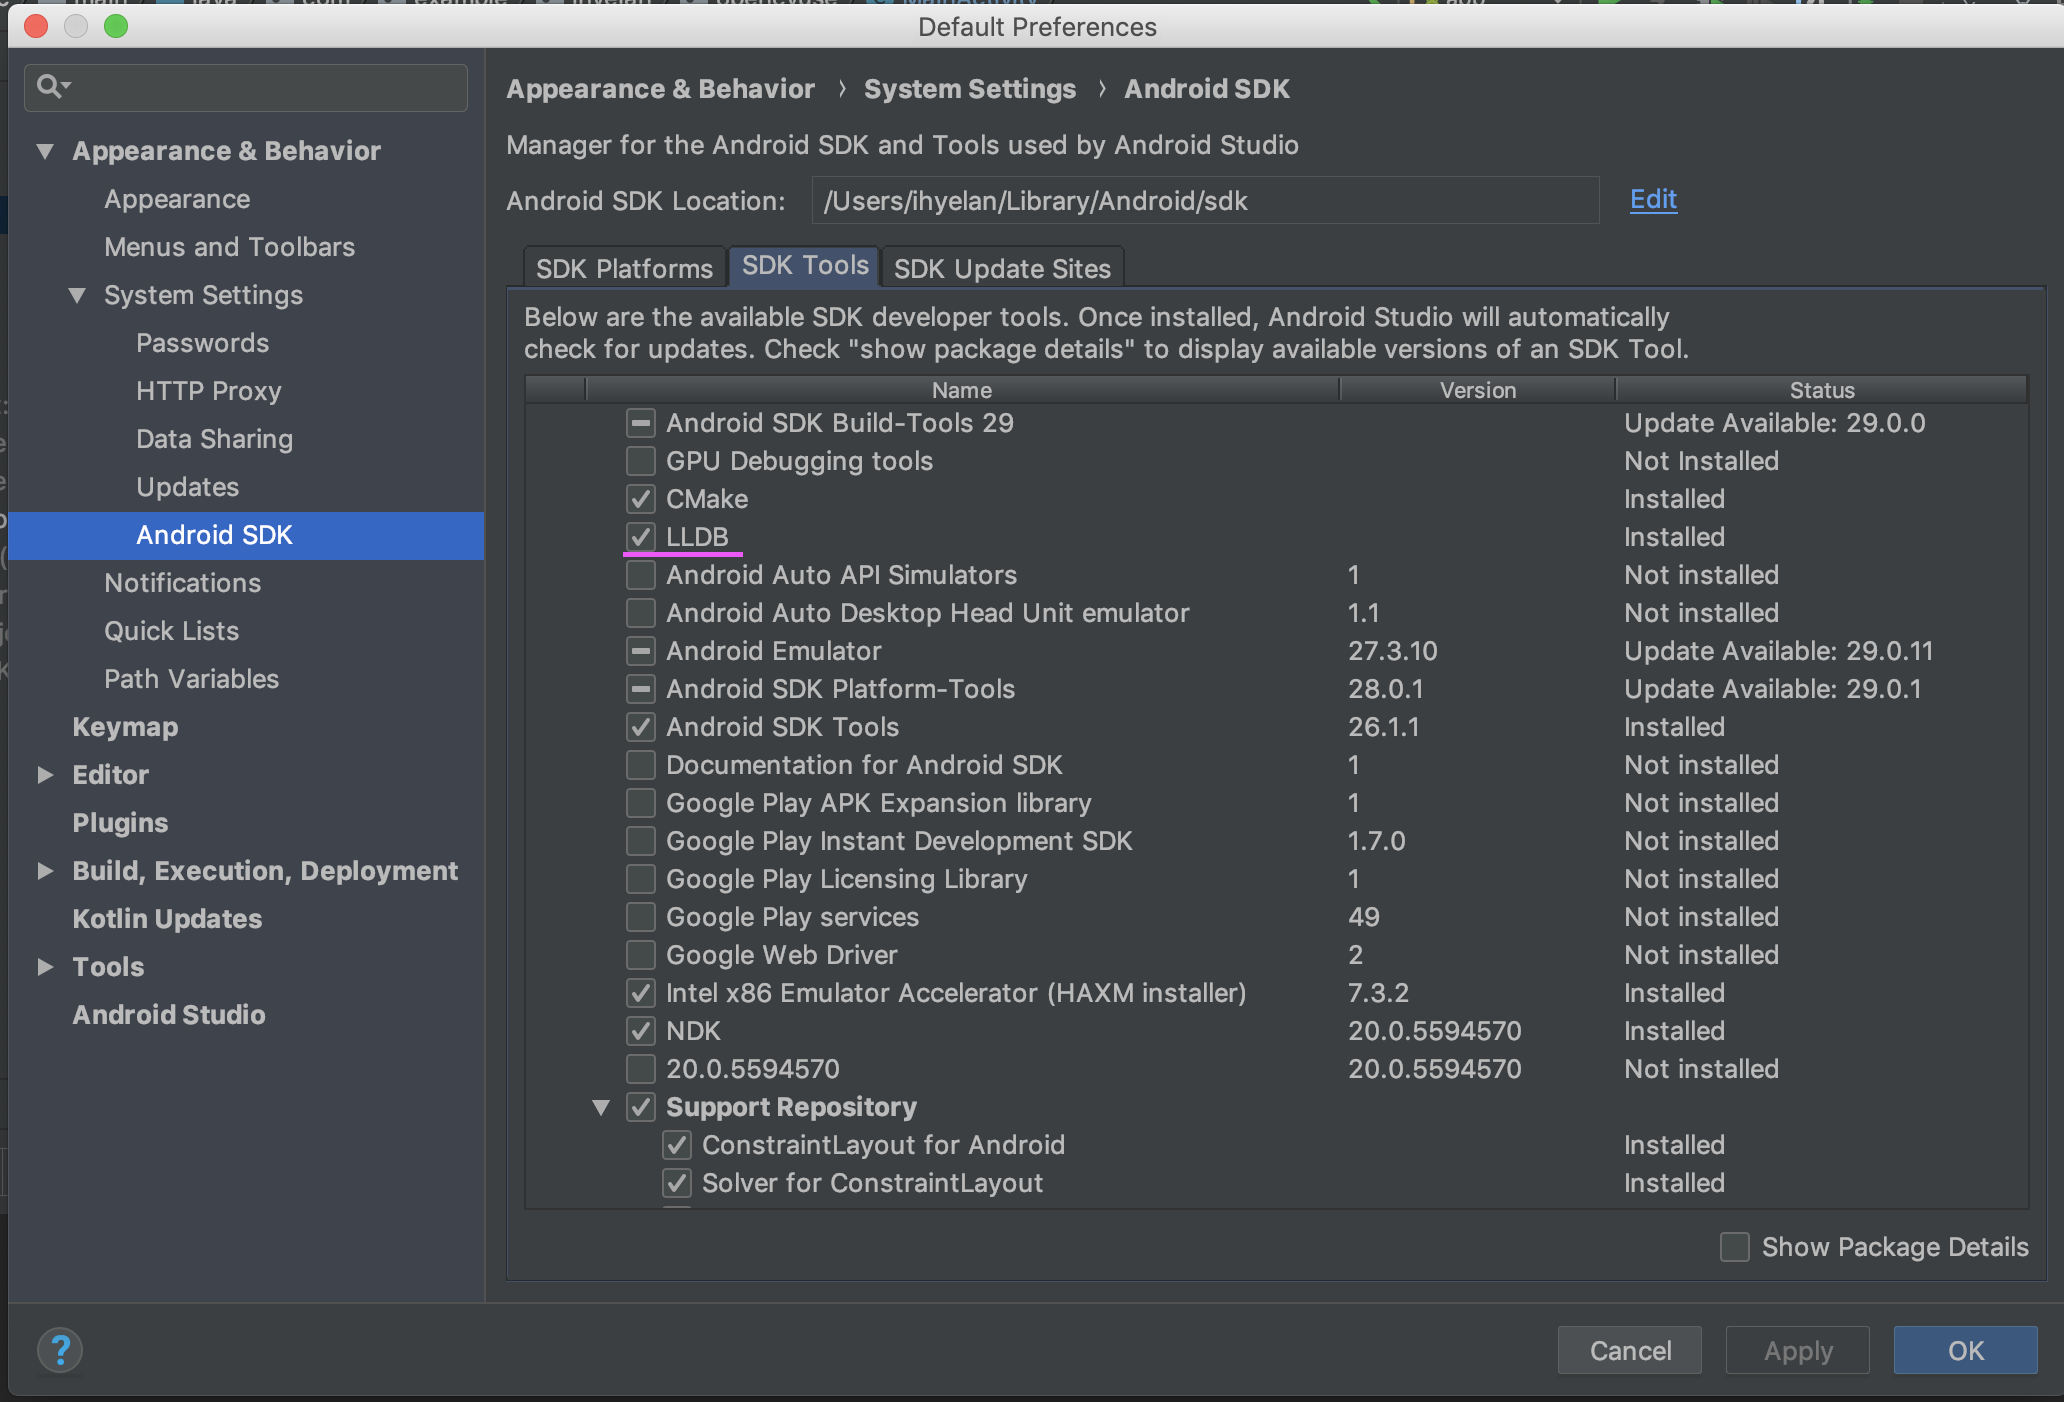
SDK Manager에서 LLDB 설치하기
-
OpenCV Module 추가
https://github.com/opencv/opencv/releases 에서 OpenCV zip 파일 다운로드 후 원하는 위치에 압축 풀기 -
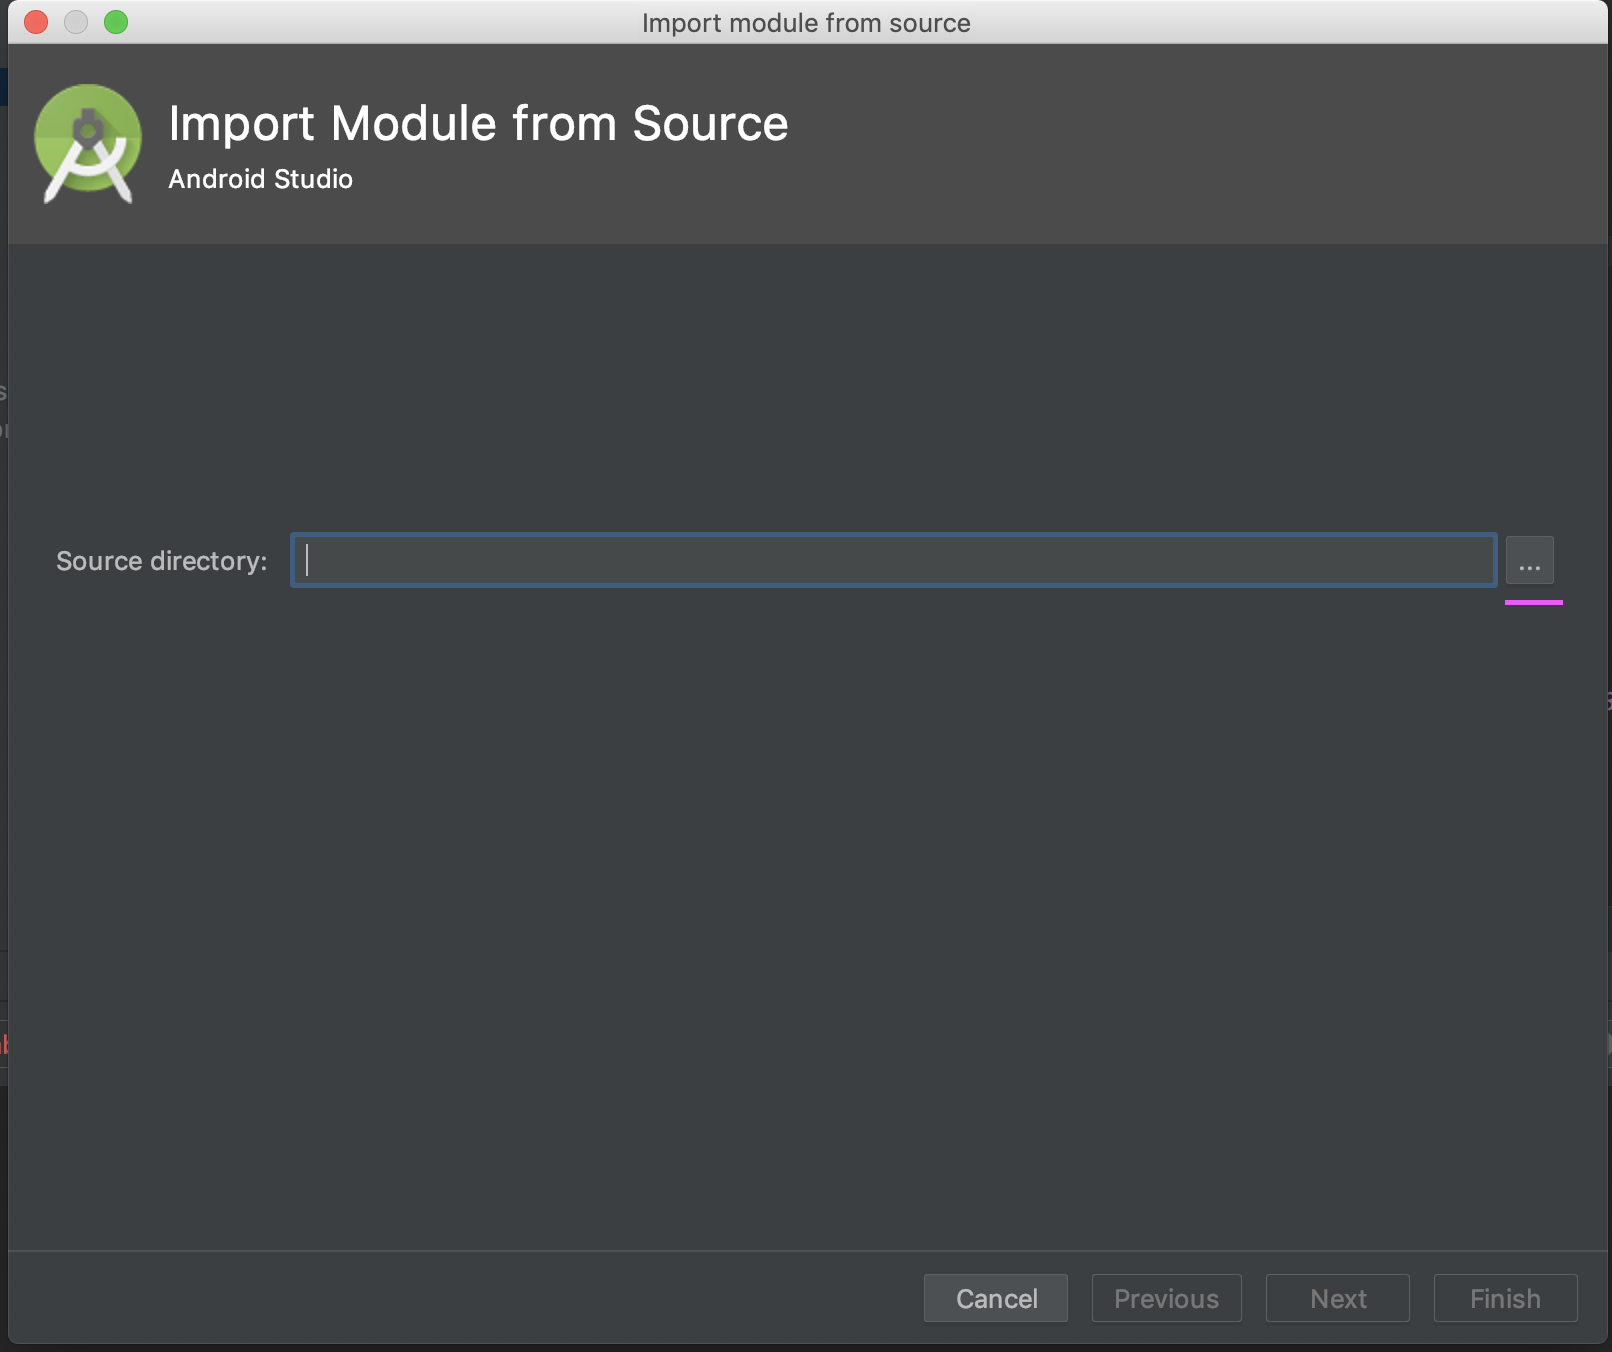
File->New->Import Module에서 OpenCV Module 안의 sdk 폴더를 지정
-
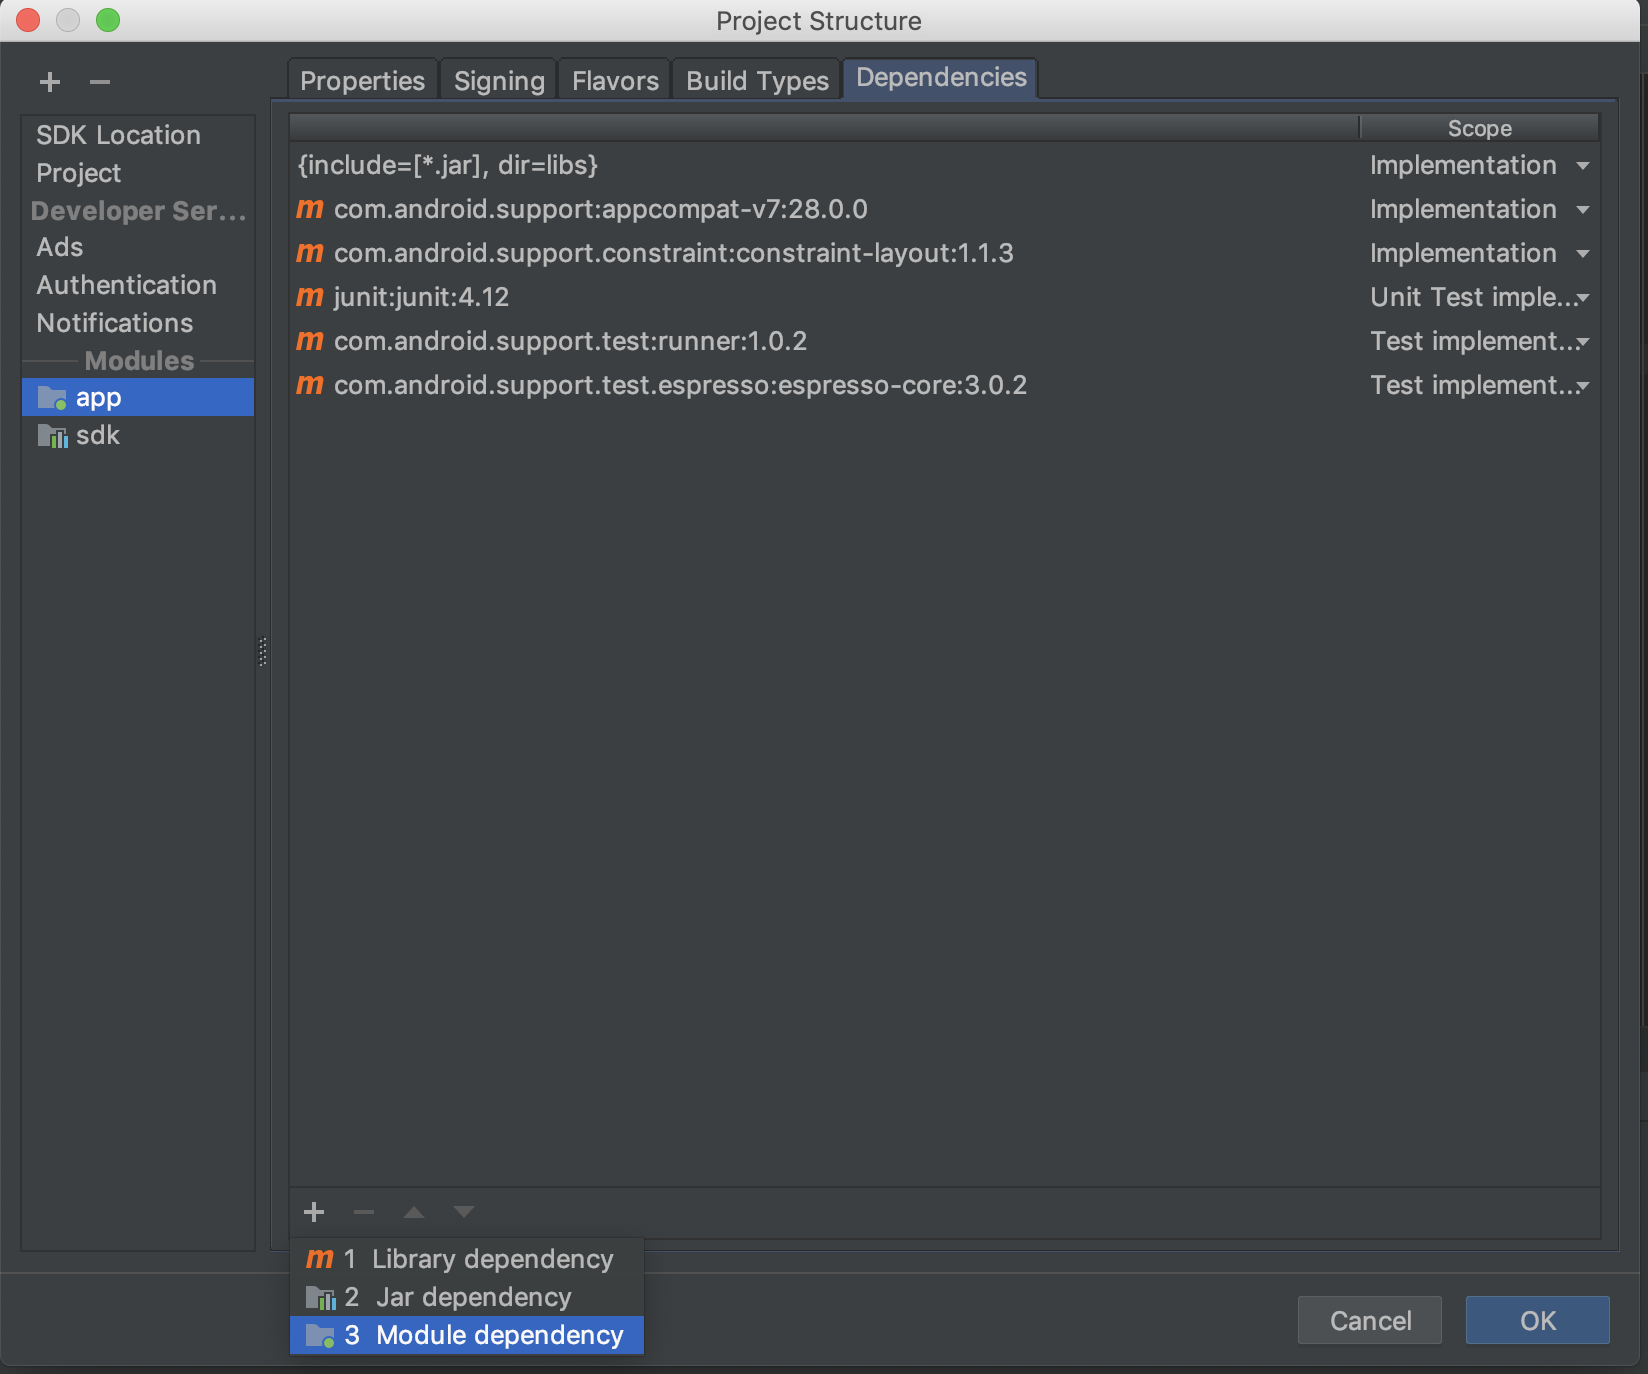
File->Project Structure에서 Module Depencency를 설정하기
-
gradle build시 만약 이런 에러가 발생한다면?
Manifest merger failed : uses-sdk:minSdkVersion 15 cannot be smaller than version 21 declared in library [:sdk] /Users/ihyelan/AndroidStudioProjects/test/sdk/build/intermediates/merged_manifests/debug/processDebugManifest/merged/AndroidManifest.xml as the library might be using APIs not available in 15
	Suggestion: use a compatible library with a minSdk of at most 15,
		or increase this project's minSdk version to at least 21,
		or use tools:overrideLibrary="org.opencv" to force usage (may lead to runtime failures)
OpenCV Module의 build.gradle에서 minSdkVersion 항목을 15로 바꿔준다.
- CMakeList.txt 에서 OpenCV 경로 설정하기
# For more information about using CMake with Android Studio, read the
# documentation: https://d.android.com/studio/projects/add-native-code.html

# Sets the minimum version of CMake required to build the native library.

cmake_minimum_required(VERSION 3.4.1)

set(pathPROJECT /Users/ihyelan/AndroidStudioProjects/test)
set(pathOPENCV ${pathPROJECT}/opencv)
set(pathLIBOPENCV_JAVA ${pathOPENCV}/native/libs/${ANDROID_ABI}/libopencv_java4.so)

set(CMAKE_VERBOSE_MAKEFILE on)
set(CMAKE_CXX_FLAGS "${CMAKE_CXX_FLAGS} -std=gnu++11")

include_directories(${pathOPENCV}/native/jni/include)


# Creates and names a library, sets it as either STATIC
# or SHARED, and provides the relative paths to its source code.
# You can define multiple libraries, and CMake builds them for you.
# Gradle automatically packages shared libraries with your APK.

add_library( # Sets the name of the library.
        native-lib

        # Sets the library as a shared library.
        SHARED

        # Provides a relative path to your source file(s).
        ${pathPROJECT}/app/src/main/cpp/native-lib.cpp )


add_library( lib_opencv SHARED IMPORTED )

set_target_properties(lib_opencv PROPERTIES IMPORTED_LOCATION ${pathLIBOPENCV_JAVA})


# Searches for a specified prebuilt library and stores the path as a
# variable. Because CMake includes system libraries in the search path by
# default, you only need to specify the name of the public NDK library
# you want to add. CMake verifies that the library exists before
# completing its build.

find_library( # Sets the name of the path variable.
        log-lib

        # Specifies the name of the NDK library that
        # you want CMake to locate.
        log )

# Specifies libraries CMake should link to your target library. You
# can link multiple libraries, such as libraries you define in this
# build script, prebuilt third-party libraries, or system libraries.

target_link_libraries( # Specifies the target library.
        native-lib

        lib_opencv

        # Links the target library to the log library
        # included in the NDK.
        ${log-lib} )
- 프로젝트 구조를 보면, MainActivity와 cpp 파일이 생겼을 것이다.
Java에서는 이런식으로 선언하고,
     /**
     * A native method that is implemesnted by the 'native-lib' native library,
     * which is packaged with this application.
     */
    public native String stringFromJNI();
Cpp파일에서 정의하여 가져다 사용하면 된다.
#include#include extern "C" JNIEXPORT jstring JNICALL Java_com_example_ihyelan_test_MainActivity_stringFromJNI( JNIEnv *env, jobject /* this */) { std::string hello = "Hello from C++"; return env->NewStringUTF(hello.c_str()); } </pre>